Notedock Features: Pinning
This is part of a series of posts highlighting Notedock’s features and functionality. From the very beginning, we’ve built many features into Notedock that can help you work faster. Up till now, most of them have been “hidden” features, that most of our users haven’t discovered yet. Hopefully, with this series of posts, you’ll learn something new that can supercharge your workflow!
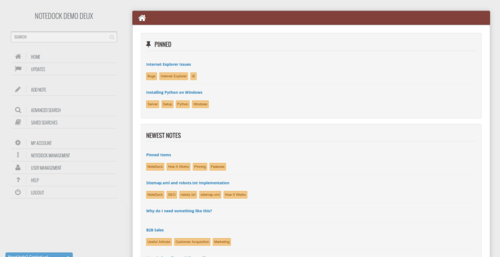
So, what is pinning anyway? Very simply, it’s like your browser’s bookmarks toolbar, but in your Notedock. Whenever you log in, you’ll see what you’ve ‘pinned’ on your Notedock homepage.
Pinning is good if you’re finding yourself working and referencing particular pages in your Notedock. If you’re working on a project that has a few Notedock pages, you can ‘pin’ them to your homepage, so that you won’t have to go searching for them buried with all your other notes each time.
Pinned items belong to each individual user. This means that members of a Notedock, can each have different things pinned. So all of your team’s members can have whatever they’re currently working on pinned to their own homepages.
So how do I go about ‘pinning’ my notes?
1.) First navigate to the page you want to pin.

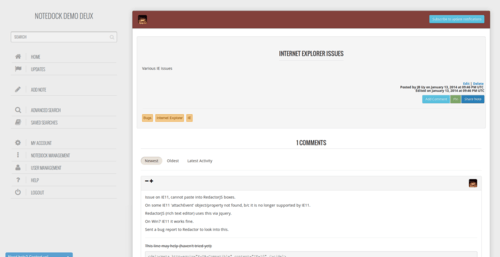
2.) Find the green ‘Pin’ button, and click it.

3.) The page will reload, and the green button will become a yellow ‘Unpin’ button. Clicking this ‘unpins’ the page from your homepage.
4.) Repeat steps 1-3 for all the pages you need to pin or unpin.
5.) Now, navigate to your Notedock homepage, and see your newly pinned pages.

Happy pinning!